If you are running a business that involves buying and selling goods, you know how tedious and time-consuming it can be to manage your purchase and purchase return transactions. You have to deal with multiple excel sheets, manual data entry, data validation, invoice creation, and data synchronization with Tally. These tasks can be prone to errors, inconsistencies, and delays, which can affect your business performance and profitability.
But what if there is a tool that can help you to automate and streamline your purchase and purchase return transactions? A tool that can save you time, money, and effort in managing your inventory, accounting, and taxation? A tool that can make your work easier and faster?
That tool is Vyapar TaxOne, a powerful and user-friendly tool that helps you to manage your purchase and purchase return transactions easily and efficiently. In this blog, we will show you how Vyapar TaxOne can help you to overcome the challenges of manual or other software-based purchase and purchase return transactions and simplify your work.
How to Upload Purchase and Purchase Return Data Entries in Tally with Vyapar TaxOne
Before uploading purchase or purchase return data entries in Tally, first, you need to do mandatory checks.
Here are they:
Prepare Data in an Excel sheet:
- Data to be uploaded should be on the first sheet.
- Ensure headers are on the top row.
- Avoid dot (.) and dollar ($) symbols in column headers.
- Invoice number must be filled and not left blank.
- Sort data AZ based on invoice numbers if needed.
- Avoid inappropriate data entries.
- Use DD/MM/YYYY date format.
- Delete unnecessary data like the Grand total.
- Limit transaction numbers to 7000 per sheet.
- Add Purchase/Purchase Ledger column according to GST Rate.
- Ensure SGST, CGST & IGST Ledgers are available in Tally.
- Format text as TEXT or General, and numbers as Number.
- Add a "Particular" column for Purchase Account ledger details based on the GST rate.
- Save the document in Excel Workbook format.
Step 1: Launch the Vyapar TaxOne app and access the bulk upload feature.
Choose "purchase" or "purchase return".

Step 2: Click on the 'Upload' button on the top right corner, and attach the file from your system.
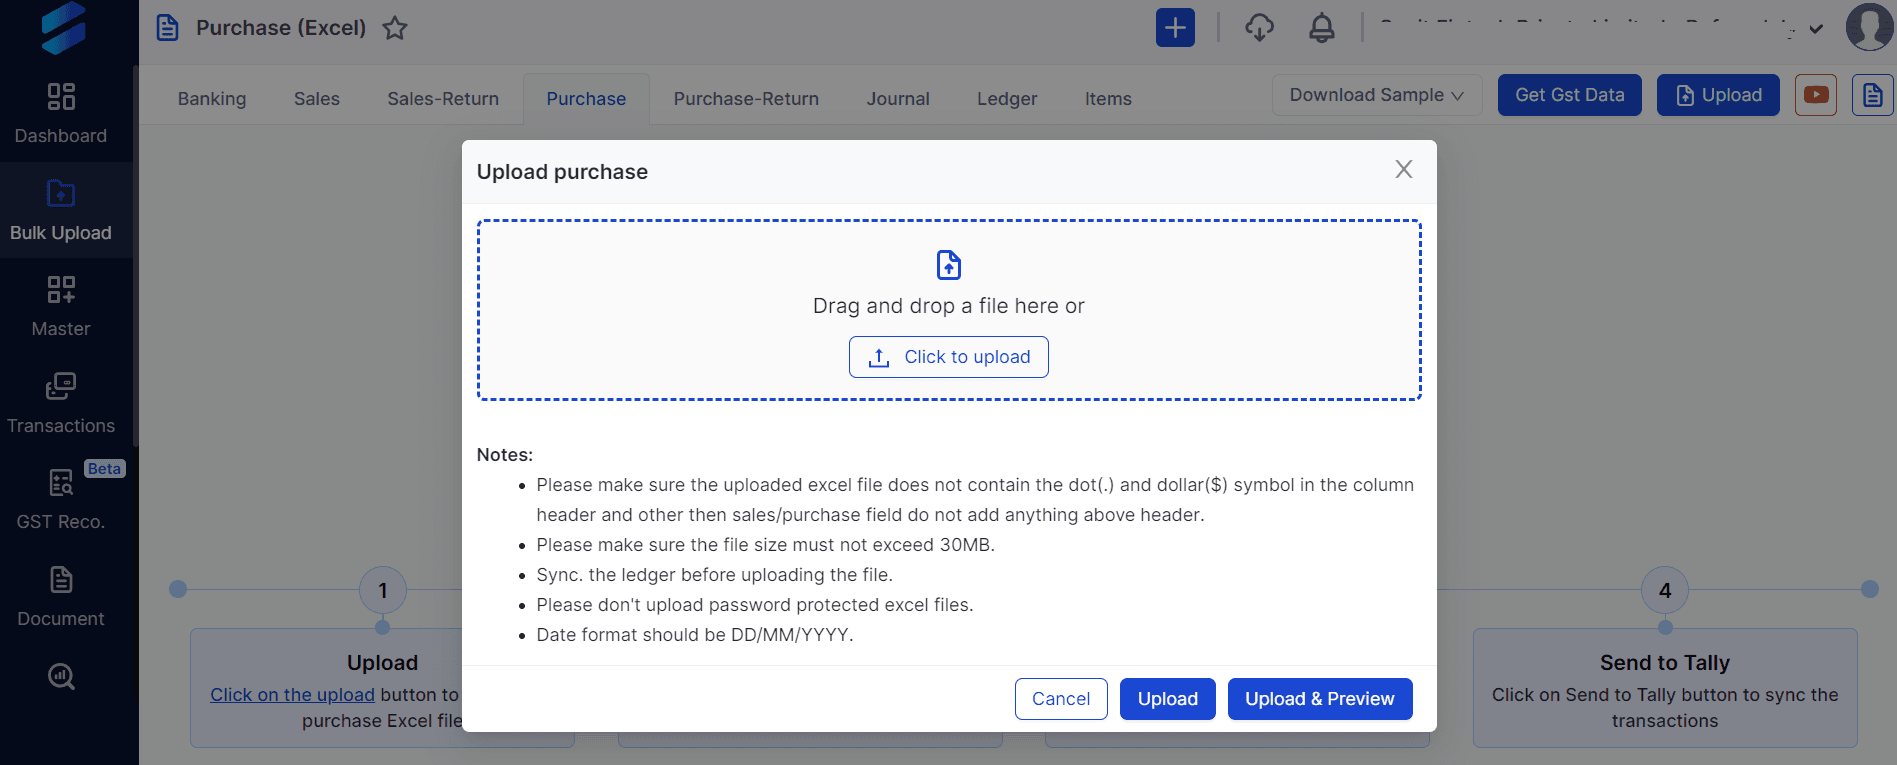
Hit "Upload" or "Upload & Preview" for a preview option.
If changes are needed, you can make them and then proceed by clicking "Save & Mapping".
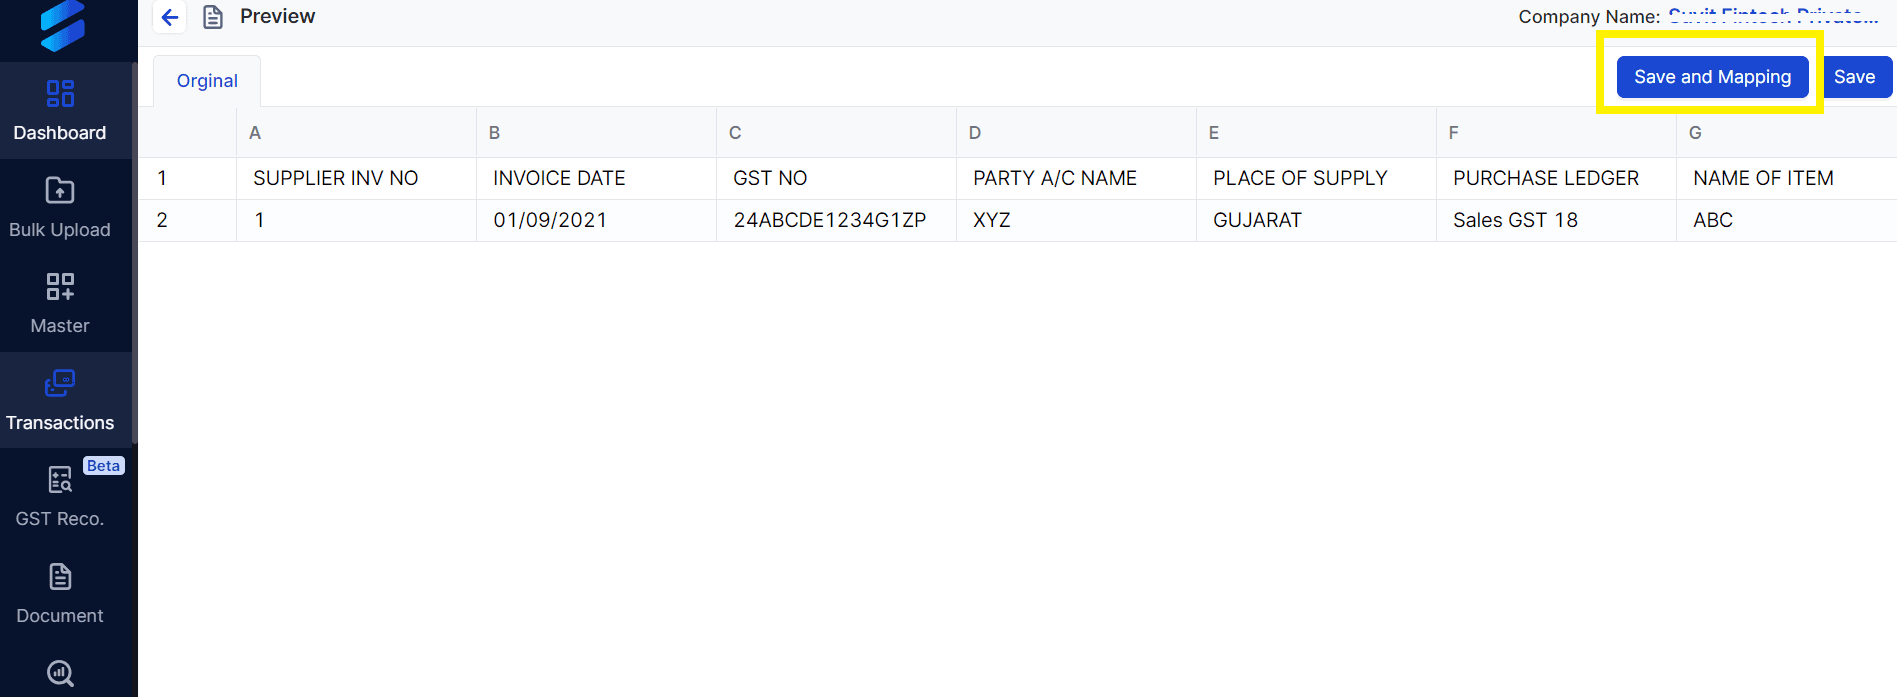
Step 3: If directly clicked on "Upload” then Click "complete" at the end of the file to enter the mapping screen.
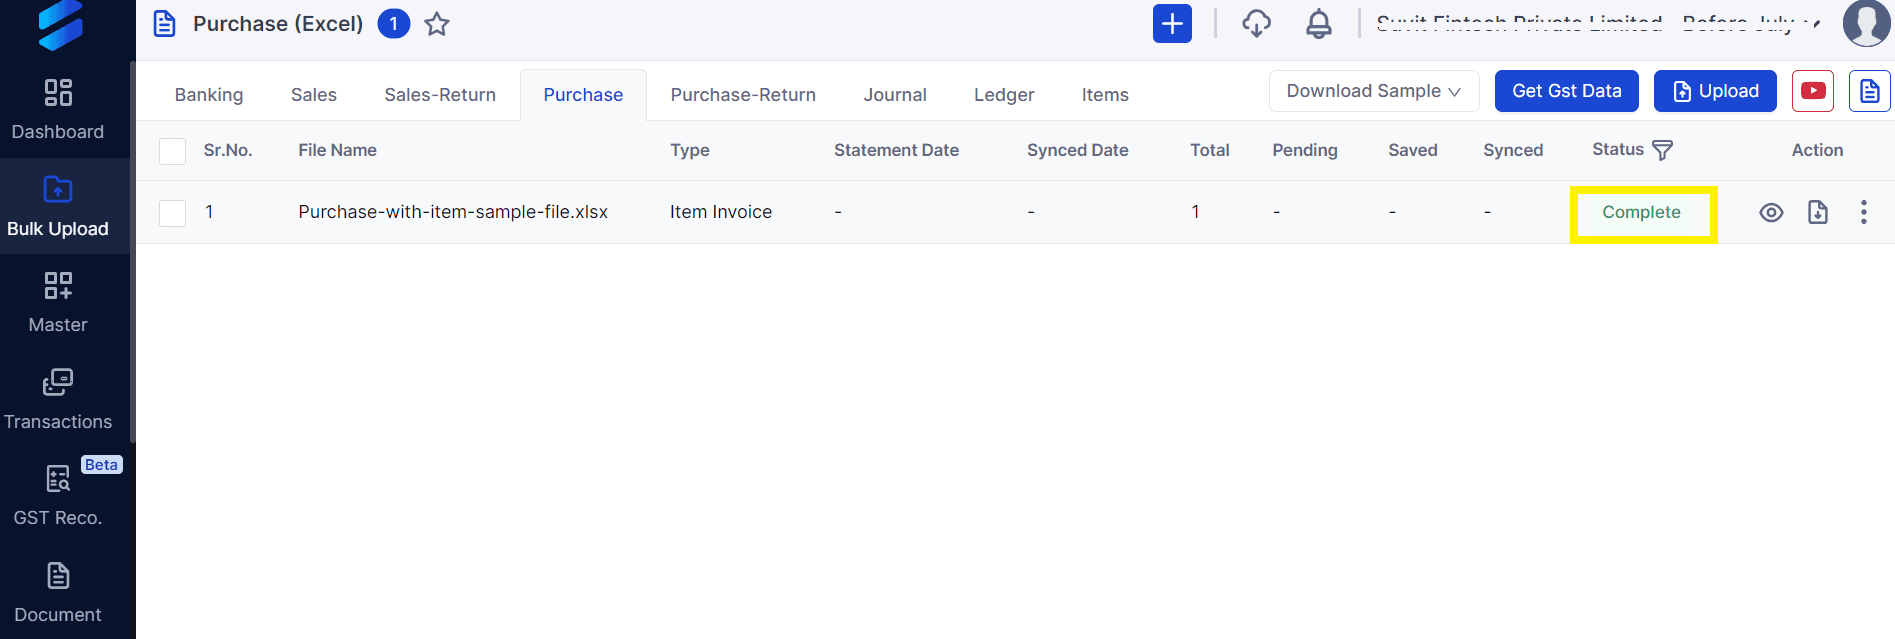
Step 4: Now for mapping, you have to follow the steps listed here. We have narrated a step-by-step procedure for doing auto mapping in Vyapar TaxOne.
Or else, you can watch a video on Ideal mapping for Sales/Purchase in Vyapar TaxOne to learn auto mapping.
How to Create an Invoice for Purchase and Purchase Return with Vyapar TaxOne
Generate invoices for purchases and purchase returns individually. This functionality enables the creation of separate bills for purchases and purchase returns.
You can access this feature within the Purchase section, under both Purchase and Purchase Return options.
To create an invoice for purchases and purchase returns with Vyapar TaxOne, you need to follow these steps:
Step 1: Navigate to Transactions > Purchase.
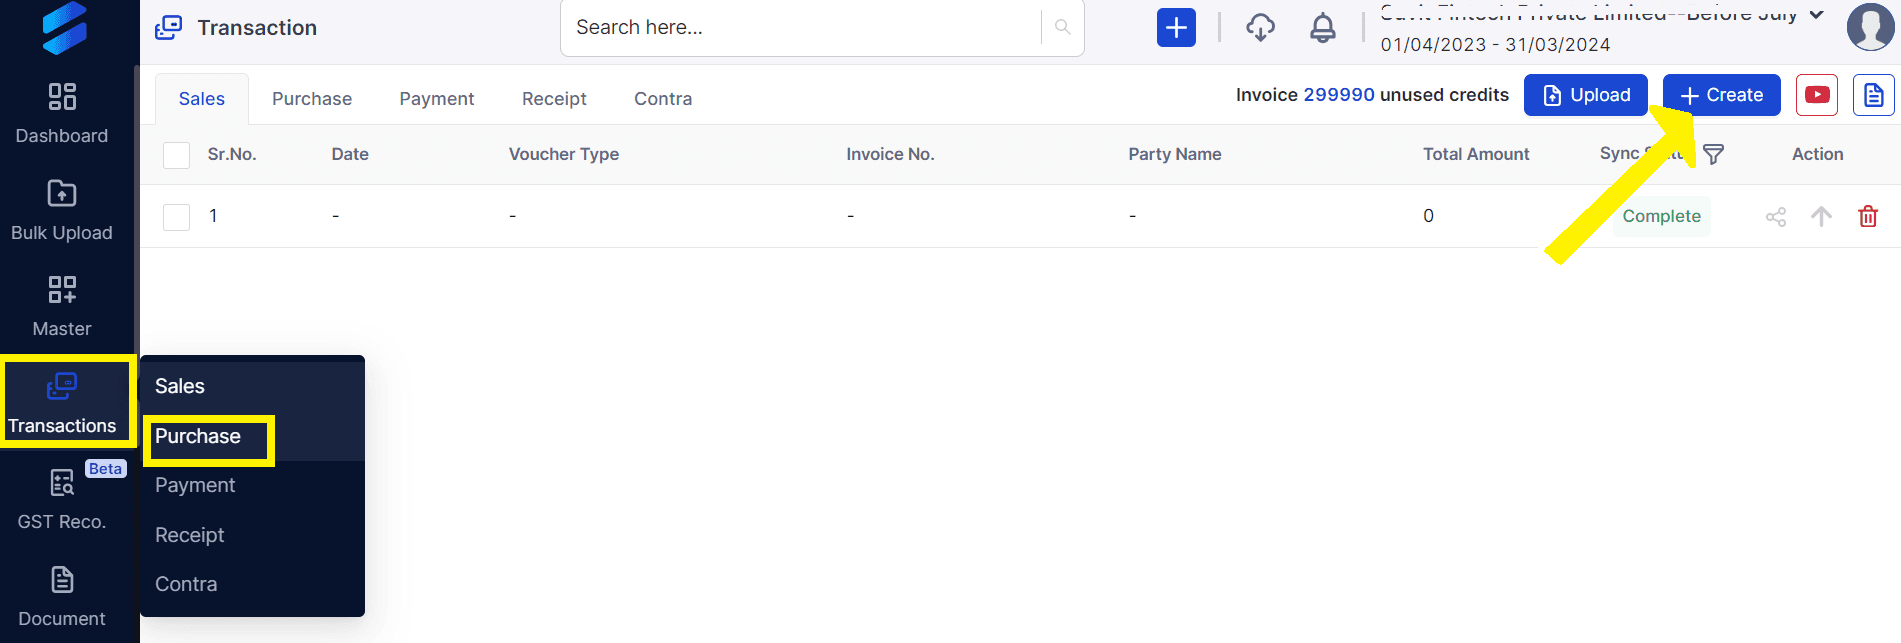
Step 2: Select the "+Create" button to create a new invoice.
Step 3: Clicking here will take you to the next screen where you can choose between a Purchase or Purchase Return invoice.
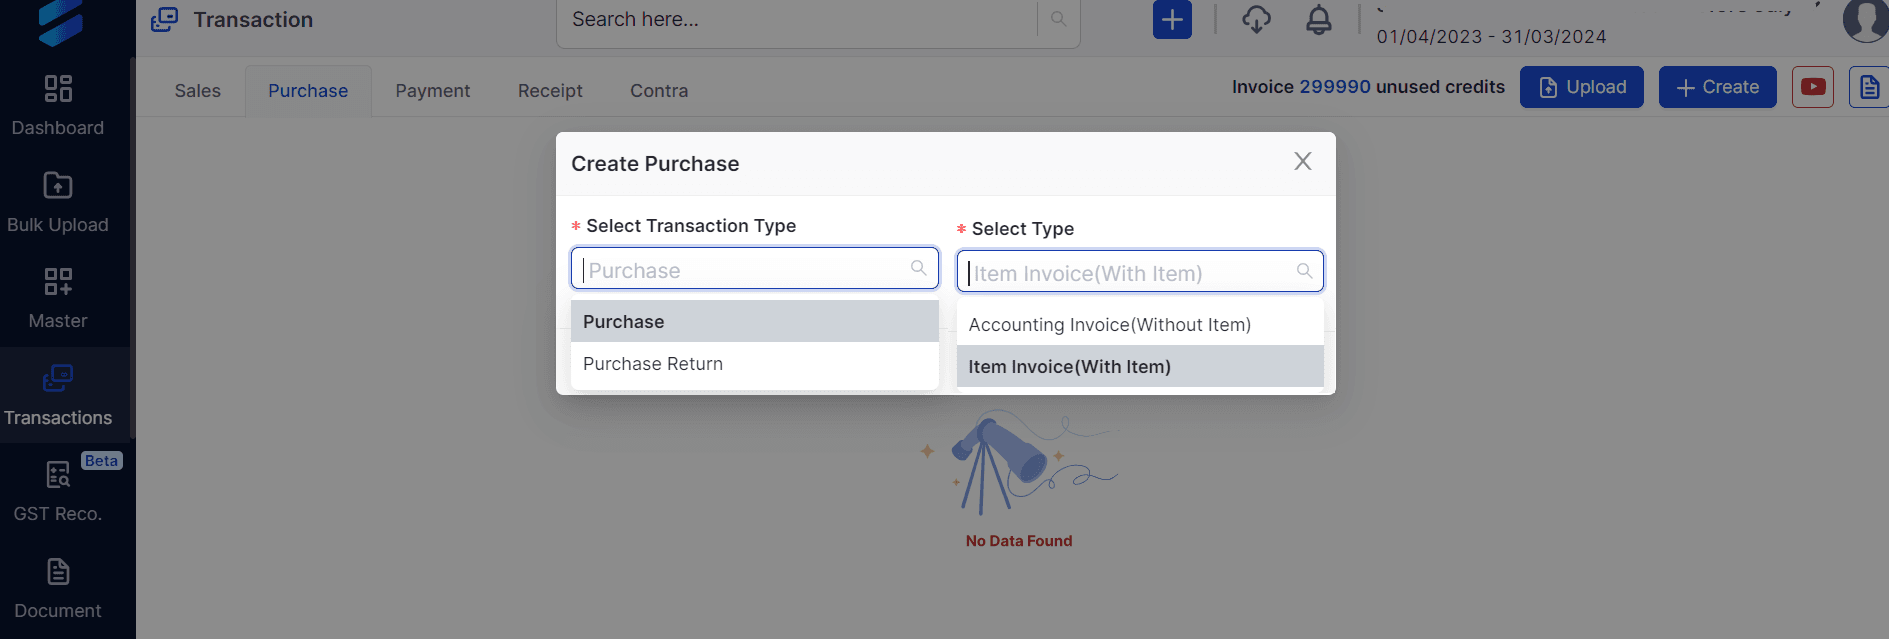
Step 4: You can then select the Type: Item invoice (with items) or Accounting Invoice (without items) from this dropdown menu.
Step 5: Click on Proceed to continue. It will direct you to the process screen as shown below. We have numbered it according to the further steps:
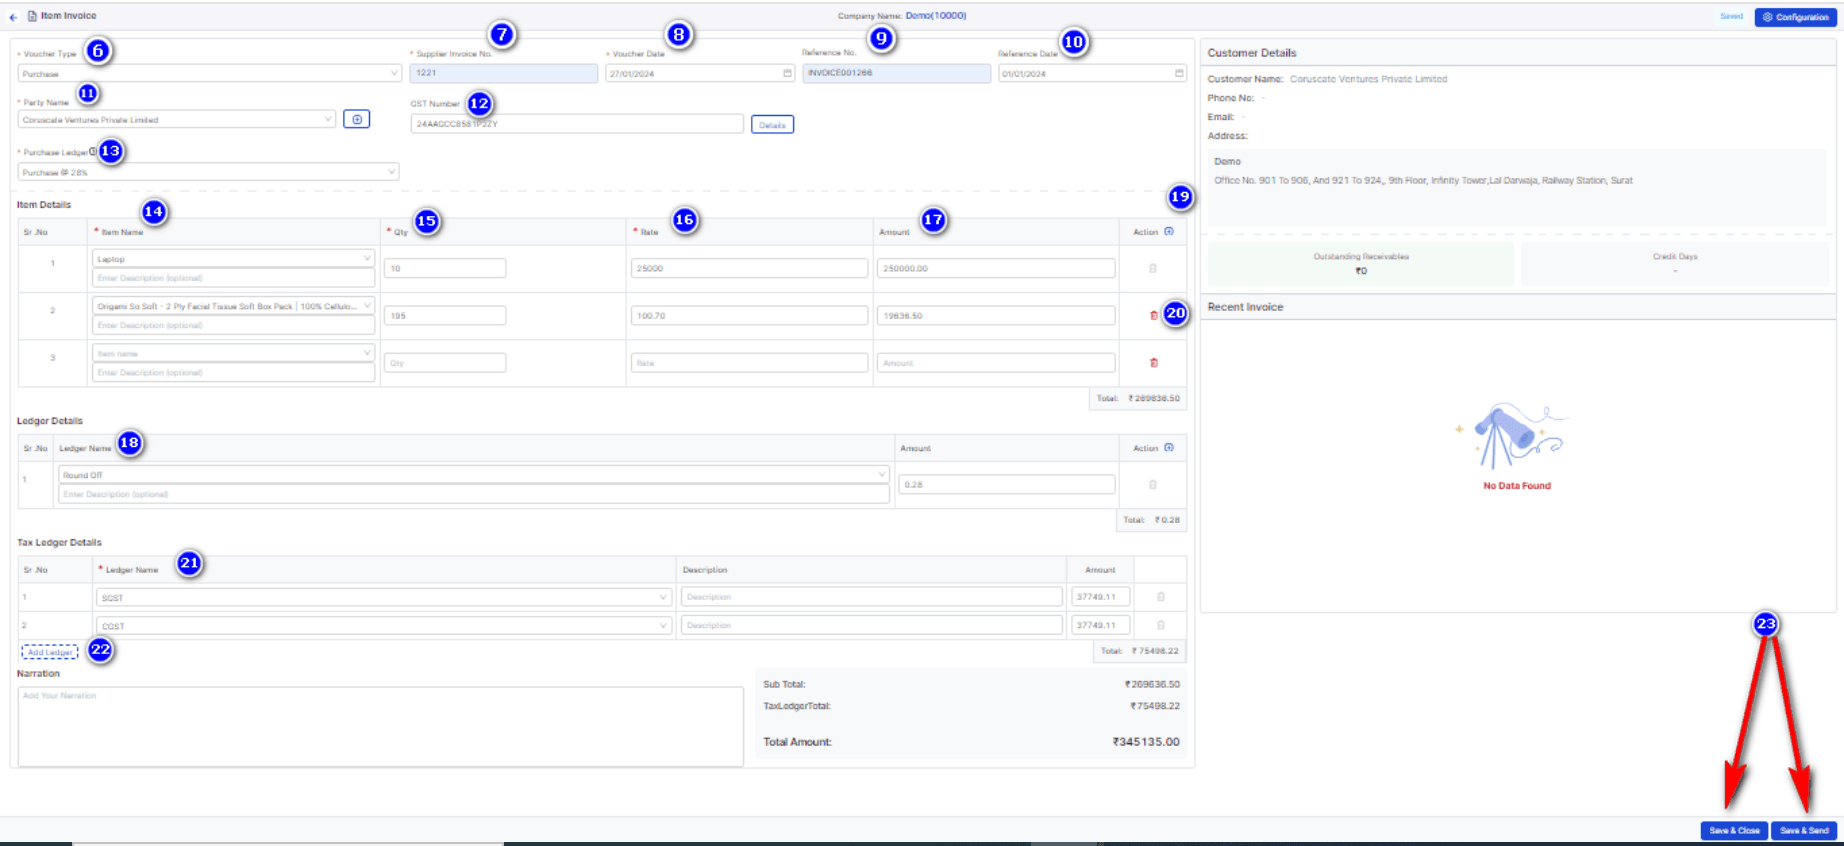
Step 6: Choose the voucher type from the dropdown menu provided.
Step 7: Input the supplier invoice number.
Step 8: Pick the voucher date from the calendar.
Step 9: Enter the reference number.
Step 10: Select the reference date from the calendar.
Step 11: Choose the party name.
Step 12: If Party A/C Name is linked with a GST Number in Tally, it will be displayed here.
Step 13: Select the appropriate Purchase Ledger.
Note: Steps 14 to 17 are exclusive to Item invoice (with Item):
Step 14: Choose stock items from the dropdown menu or search for them.
Step 15: Select the quantity according to the bill.
Step 16: Enter the rate.
Step 17: The taxable amount will be automatically calculated.
Step 18: Additional ledgers such as discount, round-off, additional charges, freight, etc., can be included.
Step 19: New items can be added from this point.
Step 20: You have the option to remove any record.
Step 21: Tax Ledgers (SGST, CGST & IGST) can be conveniently chosen from the dropdown menu.
Step 22: You can incorporate other tax-related ledgers by using the "Add Ledger" feature. Additionally, any necessary narration can be inputted here by simply typing it.
Invoice's taxable amount, applied GST value (value displayed based on Purchase Ledger or SGST, CGST, IGST, or defined Item tax), and total invoice value can be verified here.
Step 23: Once the entire process is finished, select "Save and Close" to save the bill in VYAPAR TAXONE or choose "Save and Send" to send the bill to Tally.
Or else, select the arrow icon to send the data to Tally.

How to Generate Reports and Analytics for Purchase and Purchase Return with Vyapar TaxOne
Vyapar TaxOne also helps you generate and customize various reports and analytics for your purchase and purchase return transactions.
You can use Vyapar TaxOne to generate reports such as profit and loss, balance sheet, cash flow, and so on.
You can also use Vyapar TaxOne to create dashboards with graphs and charts showing the key metrics and trends of your purchase and purchase return transactions, such as purchase by party, purchase by item, purchase by state, purchase return by party, purchase return by item, purchase return by state, and so on.
To generate reports and analytics for purchases and purchase returns with Vyapar TaxOne, you need to follow these steps:
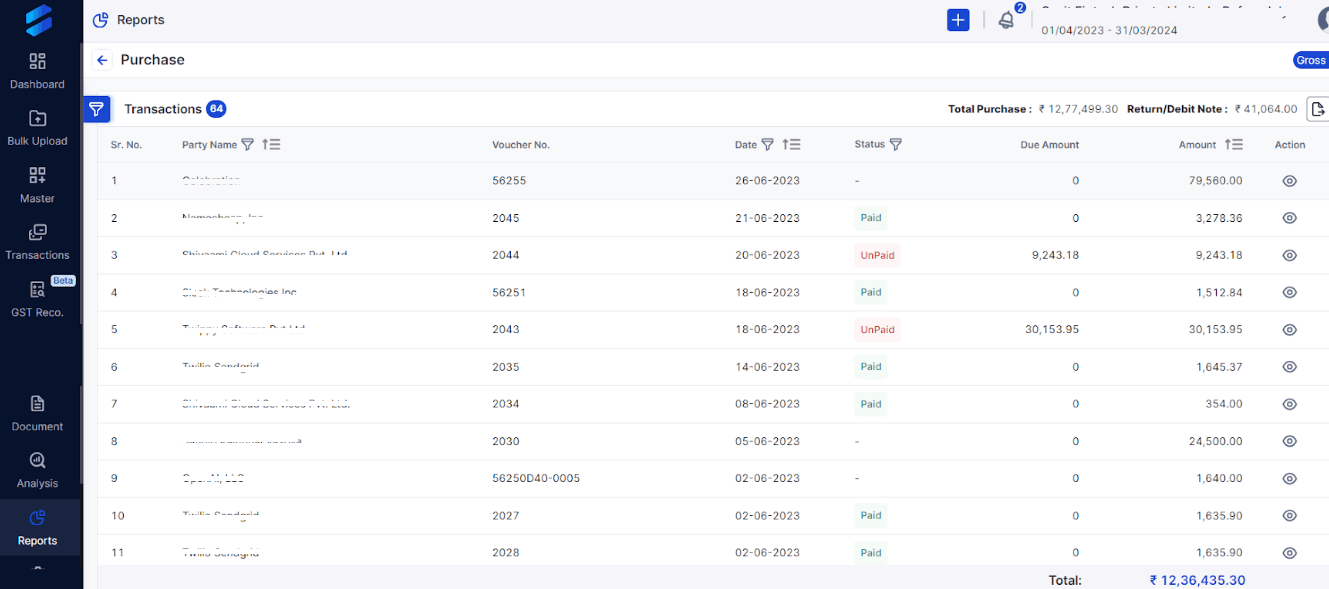
Step 1: Click on the 'Reports' tab on the left sidebar. In the report module, you can choose the company you want to make a report on and the date or period for the report. Enter this information as needed.

Step 2: Suppose you want to see a purchase-debit note, then the screen will look something like this:
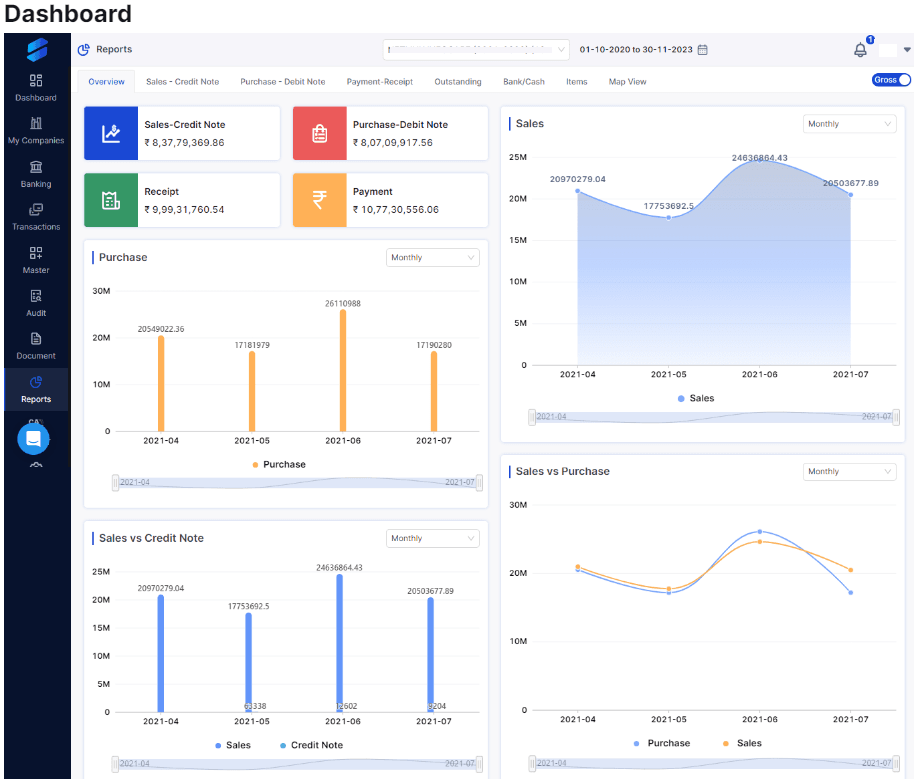
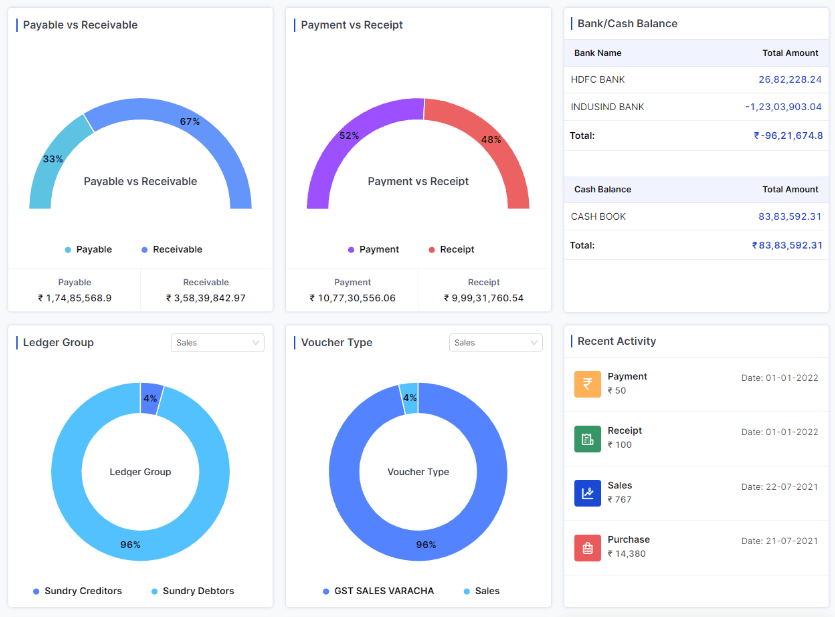
Step 3: The application will show you a dashboard with graphs of different data types, such as purchases, sales, payments, receipts, payables, receivables, and more after you choose the company and date.

Also, if you want to know how Vyapar TaxOne can help you in Sales & Sales Return transaction, you should check out this detail guide on: How to Manage Sales Entries and Sales Return Entries in Tally with Vyapar TaxOne
What are the Benefits of Using Vyapar TaxOne for Purchase and Purchase Return Transactions?
Using Vyapar TaxOne for purchase and purchase return transactions can offer you many benefits over manual or other software-based transactions. Some of the benefits are:
- You don't have to spend hours on data entry, data validation, invoice creation, and data synchronization. Vyapar TaxOne can do all these tasks for you in minutes.
- You don't have to worry about data mismatch, duplication, or omission. Vyapar TaxOne can check and correct your data automatically and alert you of any errors or warnings.
- You can maintain accurate and complete records of your purchase and purchase return transactions. You can also comply with the GST rules and regulations and avoid penalties or fines.
- You can provide your customers with timely and accurate invoices and receipts.
Still on the fence? No worries! Dive in with confidence and enjoy a 7-day trial to help you decide. Let's get started!


