


Sales and sales return are two important aspects of any business that deals with goods or services. Sales are the transactions where you sell your goods or services to your customers and generate revenue. Sales returns are the transactions where your customers return the goods or services that they have purchased from you, and you have to refund them or adjust their invoices.
Managing sales entries and sales returns entries in tally can be a tedious and time-consuming task, especially if you have to do it manually or use multiple software. You have to keep track of the invoices, payments, inventory, GST, and accounting entries for each sale and sales return. You also have to ensure that the data is accurate, consistent, and compliant with the GST rules and regulations.
That's why you need Vyapar TaxOne, a cloud-based AI tool that helps you manage your sales and sales return entries with ease and efficiency. Vyapar TaxOne is a smart and simple tool that integrates with your Tally software and automates your sales and sales return processes. With Vyapar TaxOne, you can:
- Upload your sales and sales return entries from Excel sheets or PDF files.
- Create and edit invoices for sales and sales returns.
- Sync your data with Tally in real time.
- Generate and customize various reports and analytics.
- Streamline your GST data retrieval.
In this blog, we will show you how to use Vyapar TaxOne to manage your sales entries and sales return entries in Tally, and how it can benefit your business.
How to Upload Sales and Sales Return Data Entries in Tally with Vyapar TaxOne
One of the main features of Vyapar TaxOne is that it allows you to upload your sales and sales return data from Excel sheets or PDF files. This way, you can save time and effort by avoiding manual data entry and errors. You can also use Vyapar TaxOne to create new ledgers and stock items from the sales and sales return transaction screen if they are not already present in your Tally software.
To upload your sales and sales return data entries in tally, you need to follow these steps:
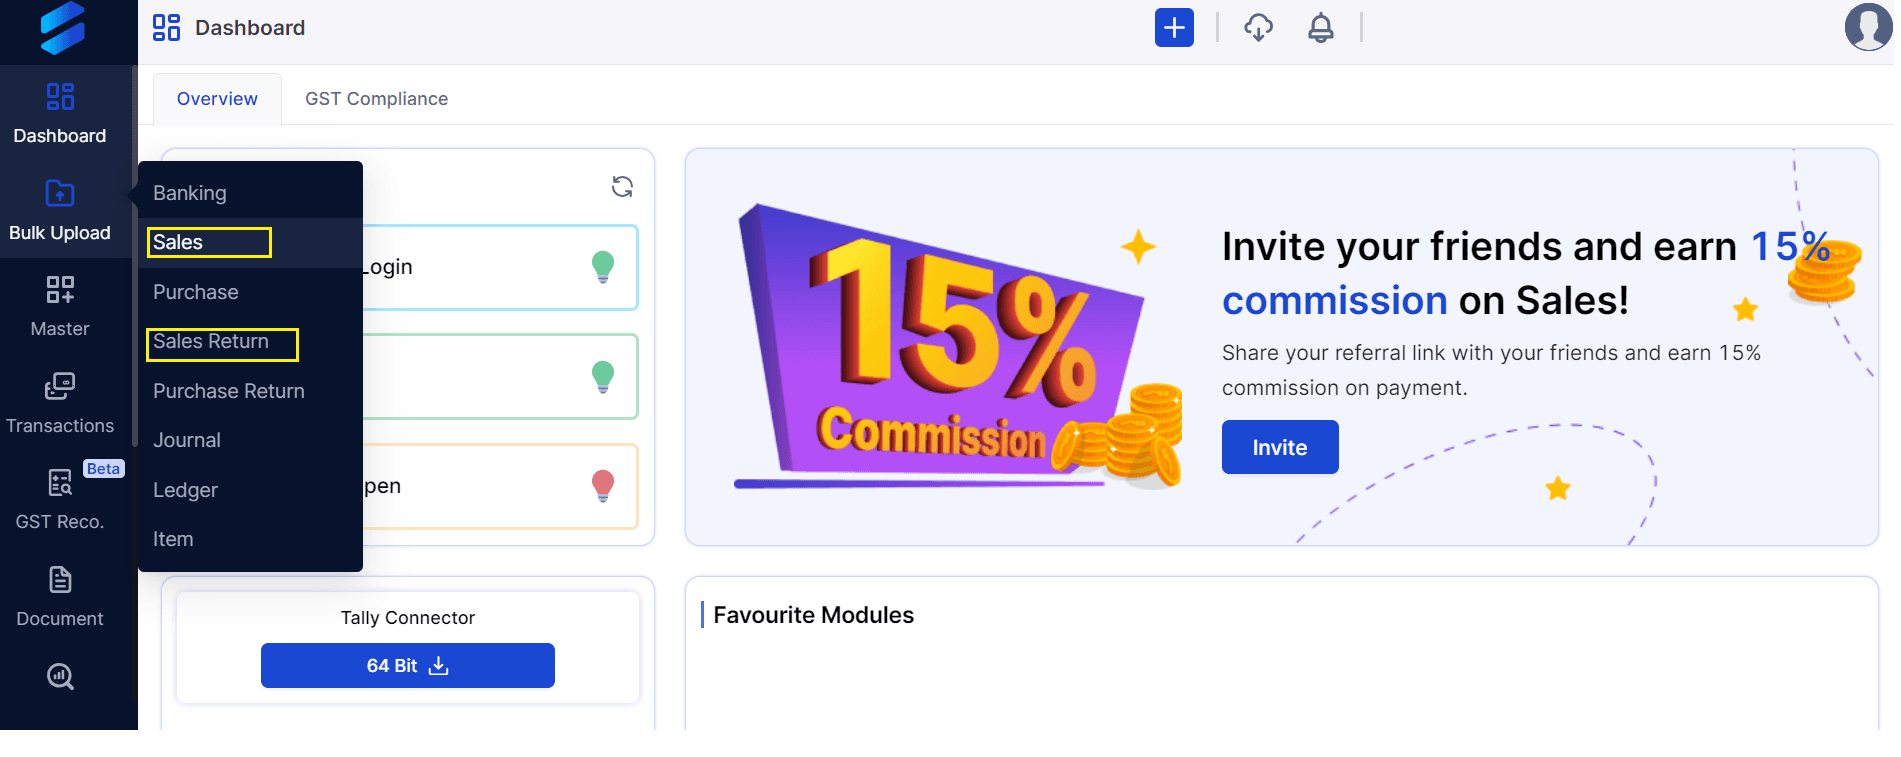
Step 1: Log in to your Vyapar TaxOne account.
Step 2: Click on the 'Sales' or 'Sales Return' tab on the left sidebar, depending on the type of transaction you want to upload.
Step 3: Click on the 'Upload' button on the top right corner, and choose the file format (Excel or PDF) that you want to upload.
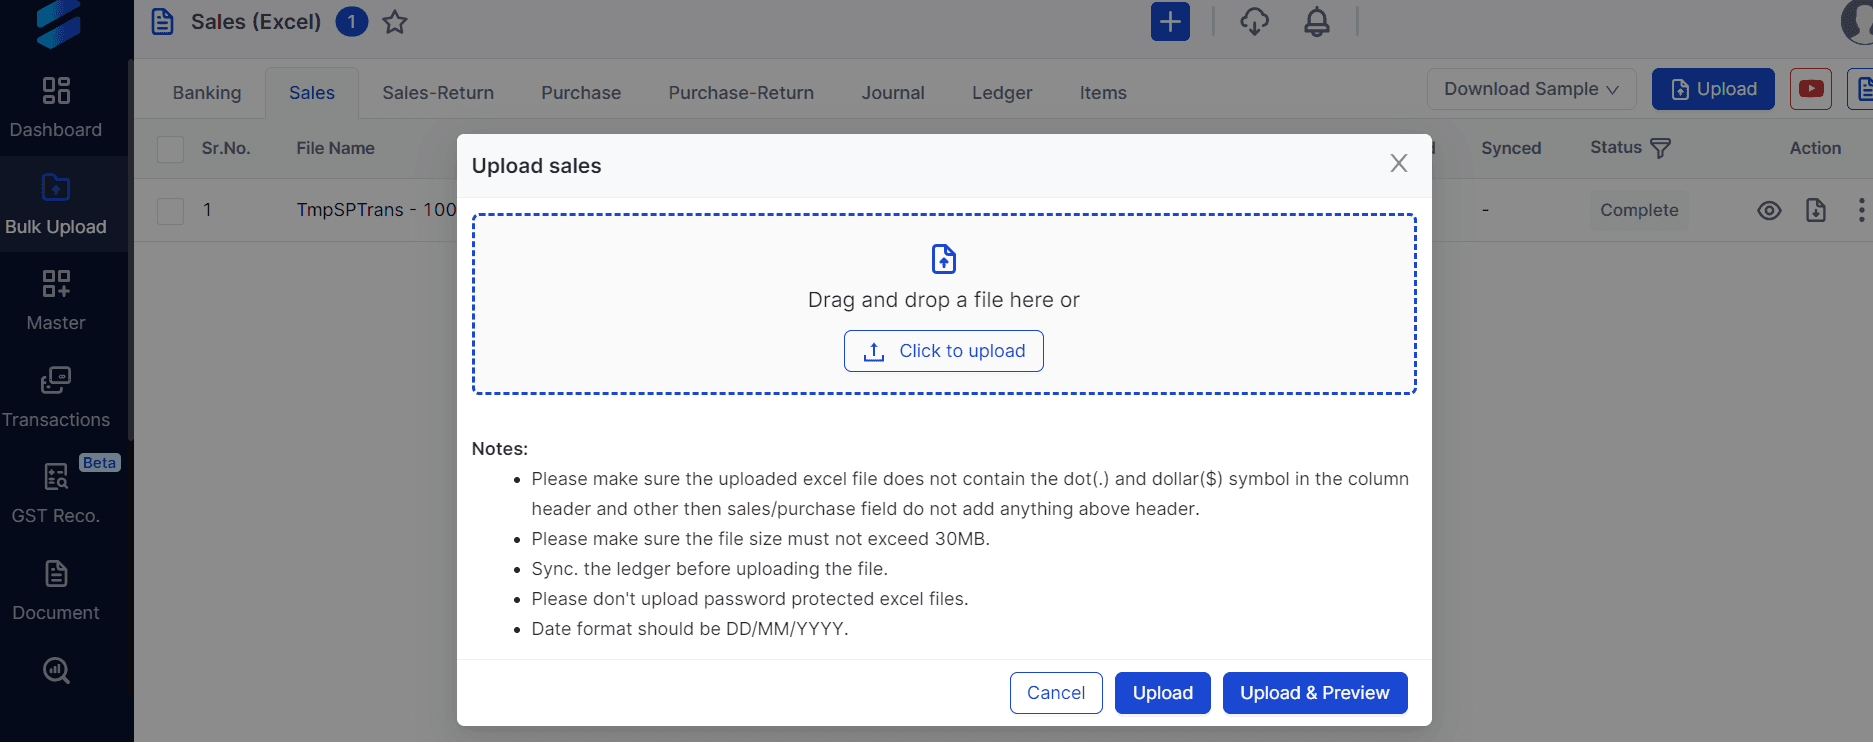
Step 4: Select the file from your device, and click on 'Open'.
Step 5: Wait for the file to upload and process. You will see a confirmation message once the file is uploaded successfully.

Step 6: Click on the 'Process' button to push the transactions to Tally. You will see a confirmation message once the transactions are processed successfully.
See a detailed video on Uploading Sales Excel Data from Vyapar TaxOne to Tally.
How to Create an Invoice for Sales and Sales Return with Vyapar TaxOne
Another feature of Vyapar TaxOne is that it allows you to create invoices for sales and sales return transactions.
To create an invoice for sales and sales returns with Vyapar TaxOne, you need to follow these steps:
Step 1: Go to Transaction > Sales.

Step 2: Click on +Create in the top right corner to create a new invoice.
Step 3: Choose the type of invoice: Item invoice (with item) or Accounting invoice (without item).
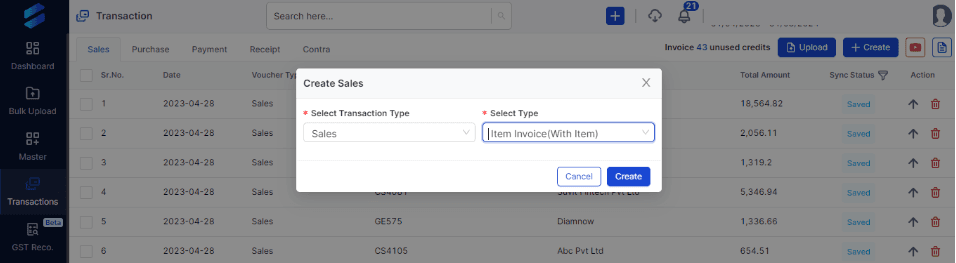
Step 4: Click on Proceed to continue.
Step 5: You will see the process screen as shown below. We have numbered it according to the further steps:
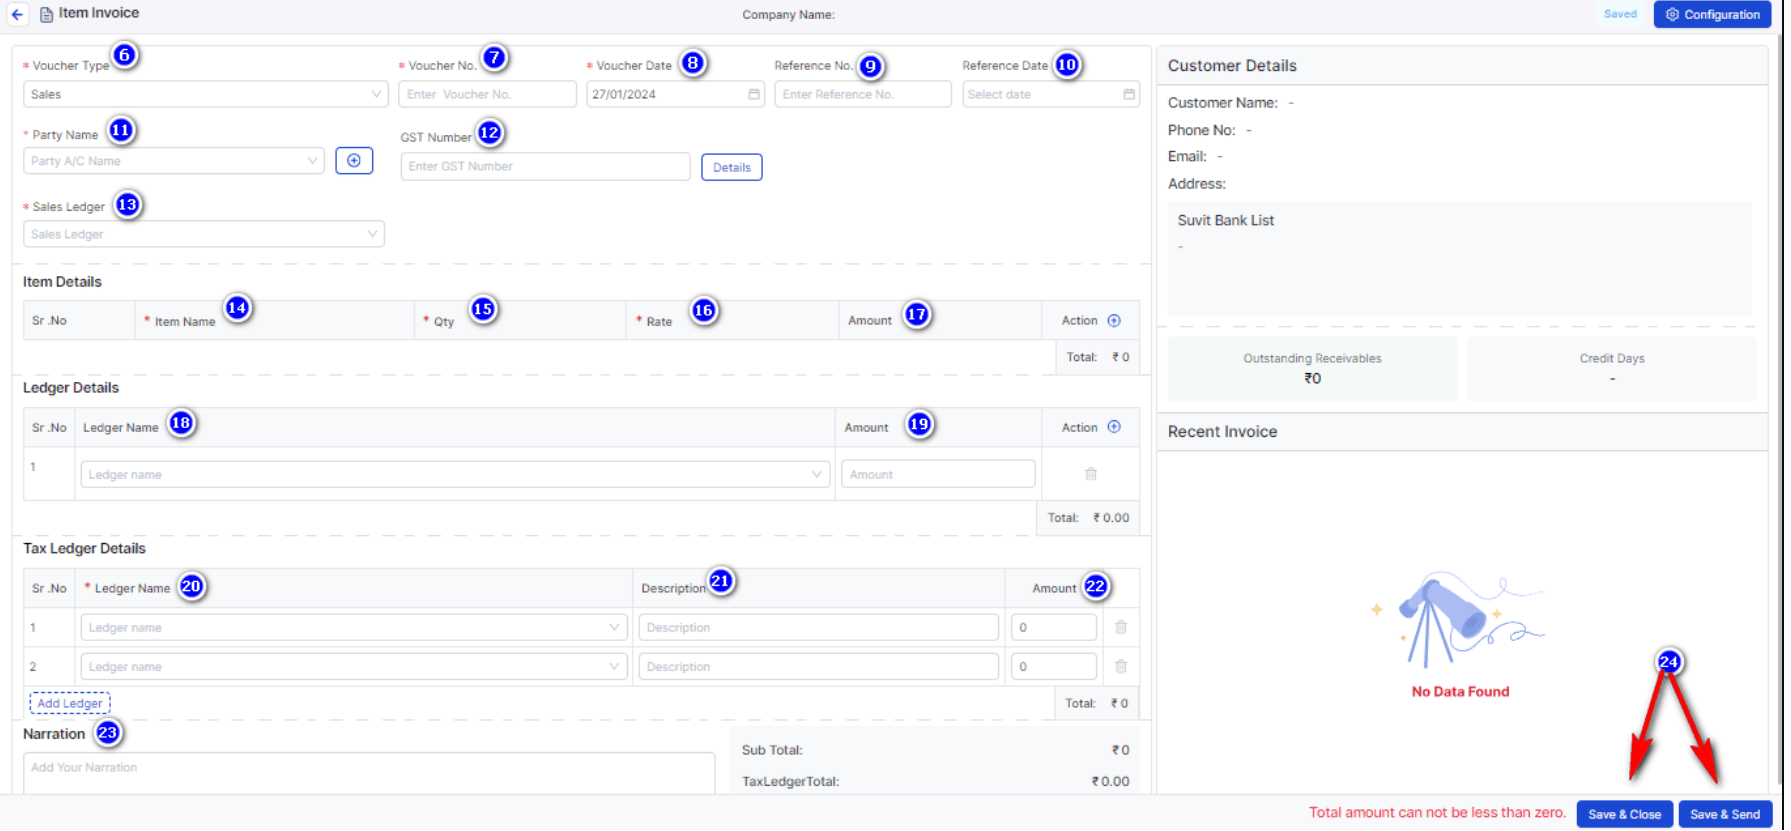
Step 6: Select the voucher type that you need.
Step 7: Enter the voucher number.
Step 8: Enter the voucher date.
Step 9: If you need a reference number, enter it here.
Step 10: If you need a reference date, enter it here.
Step 11: Enter the party name and select it from the drop-down list.
Step 12: If the party is GST registered and you want to include the GST number, enter it here.
Step 13: Select the sales ledger that you want to use.
Note: Use steps 14 to 17 for item invoices (with item) Only .
Step 14: Select the stock items from the drop-down list or by searching for them.
Step 15: Enter the quantity as per the bill.
Step 16: Enter the rate per unit.
Step 17: The taxable amount will be calculated automatically.
If you have more than one stock item in the bill, you can add another one by clicking on Add Stock Item.
Step 18: If you need to add any other ledgers, you can do so by clicking on Add Ledger.
Step 19: Enter the amount for the other ledger that you have added.
Step 20: Select the tax ledger (SGST, CGST, or IGST) from the drop-down list.
Step 21: If you want to add any description, you can write it here.
Step 22: You can check the invoice taxable amount, the applied GST value (which will depend on the sales ledger or the SGST, CGST, or IGST tax rate), and the total invoice value here.
Step 23: If you want to add any narration, you can write it here.
Step 24: After completing the entire process, click on Save & Close or Save & Send to finish.
Step 26: To send the bill to Tally, click on the arrow button.
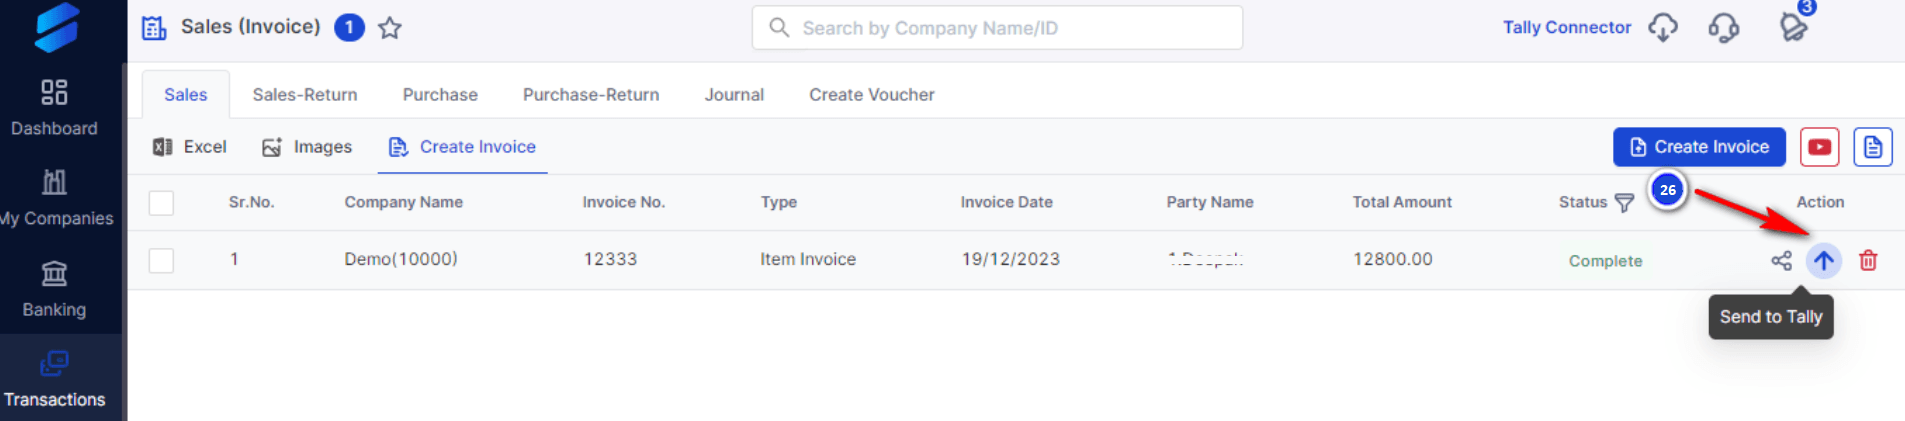
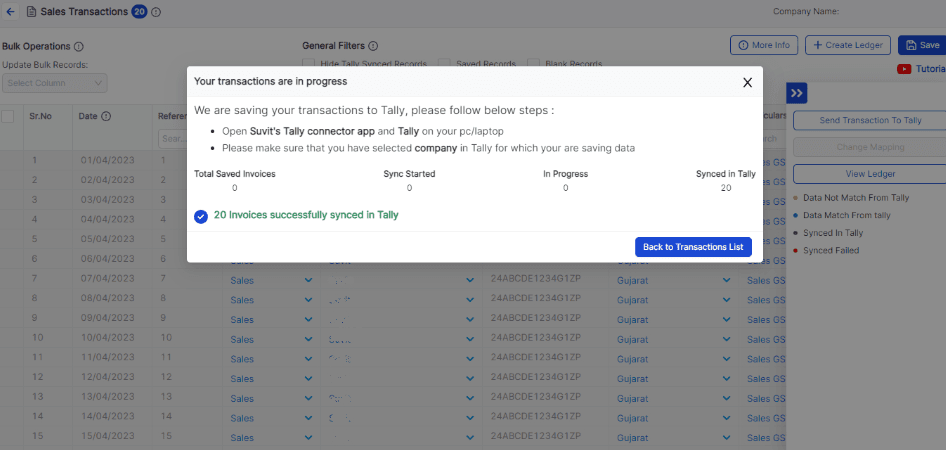
Vyapar TaxOne will start the process of transferring the invoice to Tally.
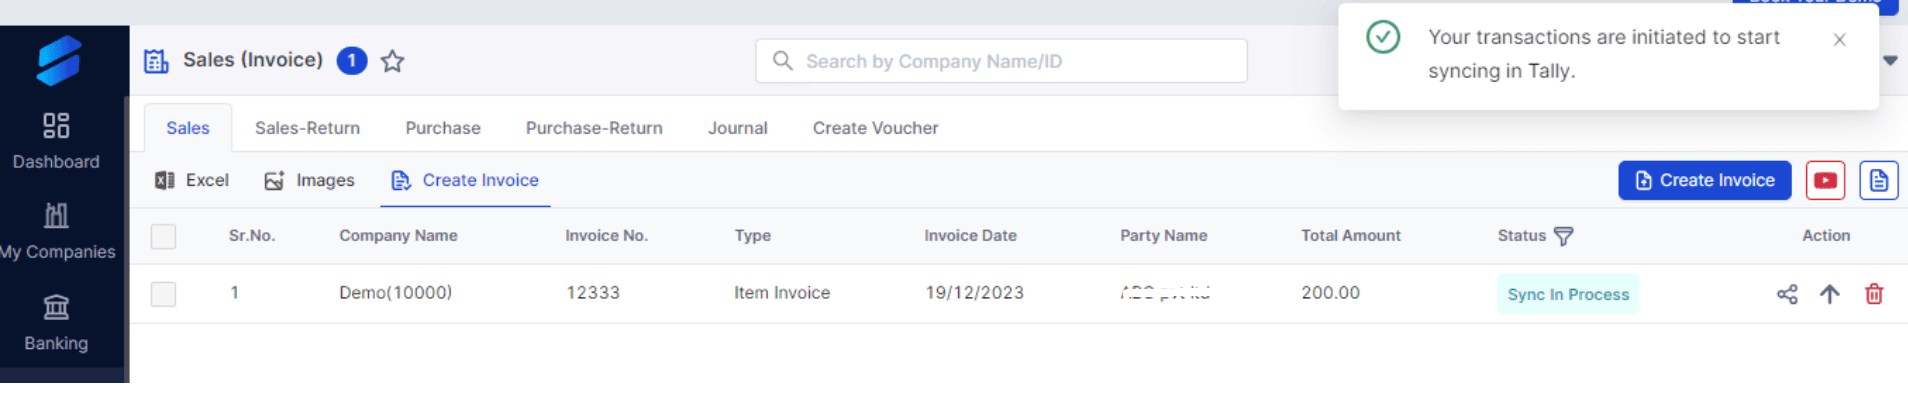
You can see the data pushing counter on the Vyapar TaxOne Desktop Application
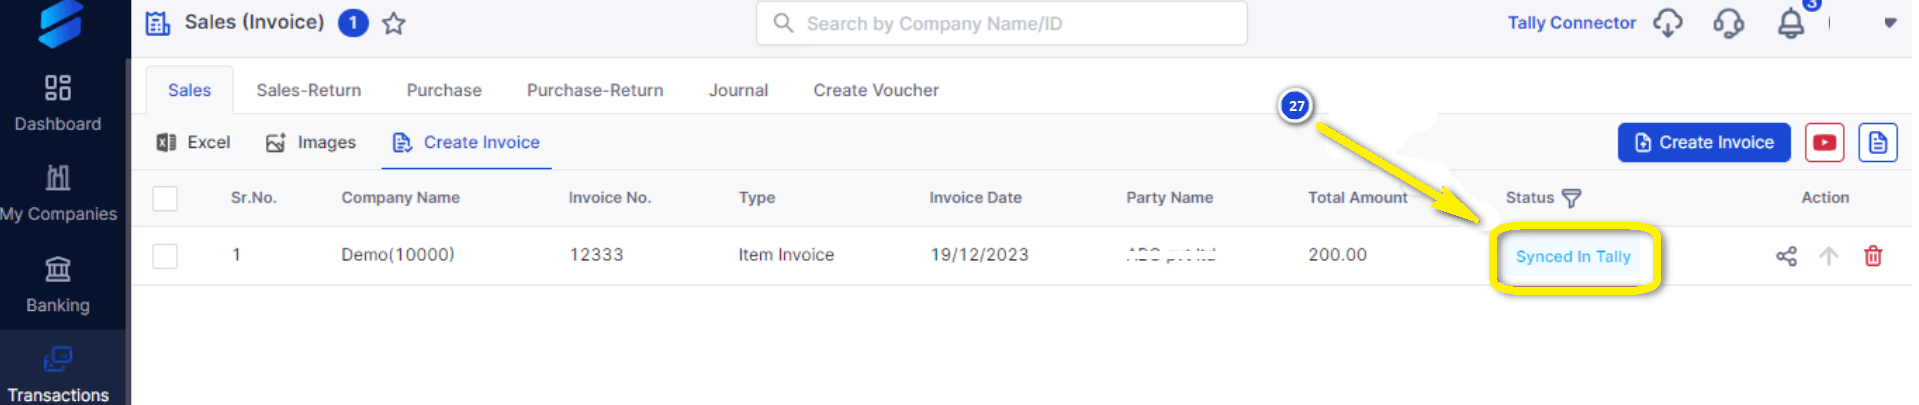
Step 27: When the data is synced, Vyapar TaxOne will display the status as Synced in Tally.
How to Generate Reports and Analytics for Sales and Sales Return with Vyapar TaxOne
Vyapar TaxOne also helps you generate and customize various reports and analytics for your sales and sales return transactions.
You can use Vyapar TaxOne to generate reports such as profit and loss, balance sheet, cash flow, and so on.
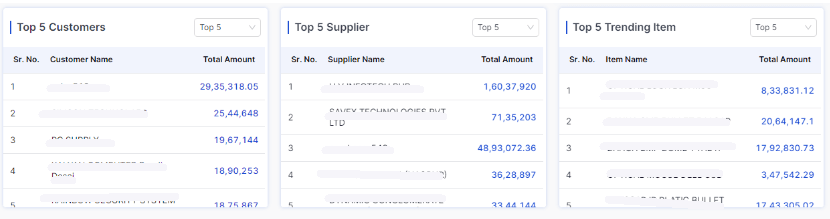
You can also use Vyapar TaxOne to create dashboards with graphs and charts showing the key metrics and trends of your sales and sales return transactions, such as sales by party, sales by item, sales by state, sales return by party, sales return by item, sales return by state, and so on.
To generate reports and analytics for sales and sales return with Vyapar TaxOne, you need to follow these steps:
Step 1: Click on the 'Reports' tab on the left sidebar. In the report module, you can choose the company you want to make a report on and the date or period for the report. Enter this information as needed.
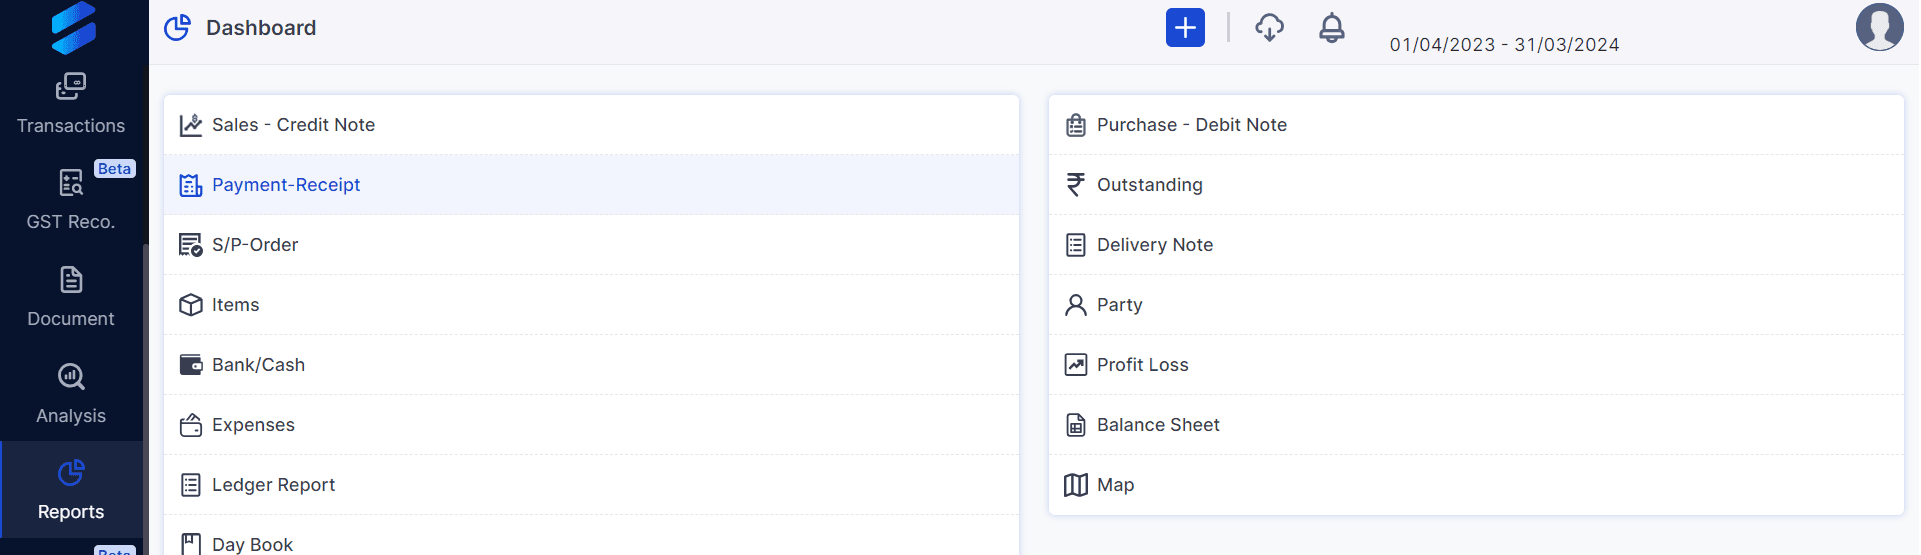
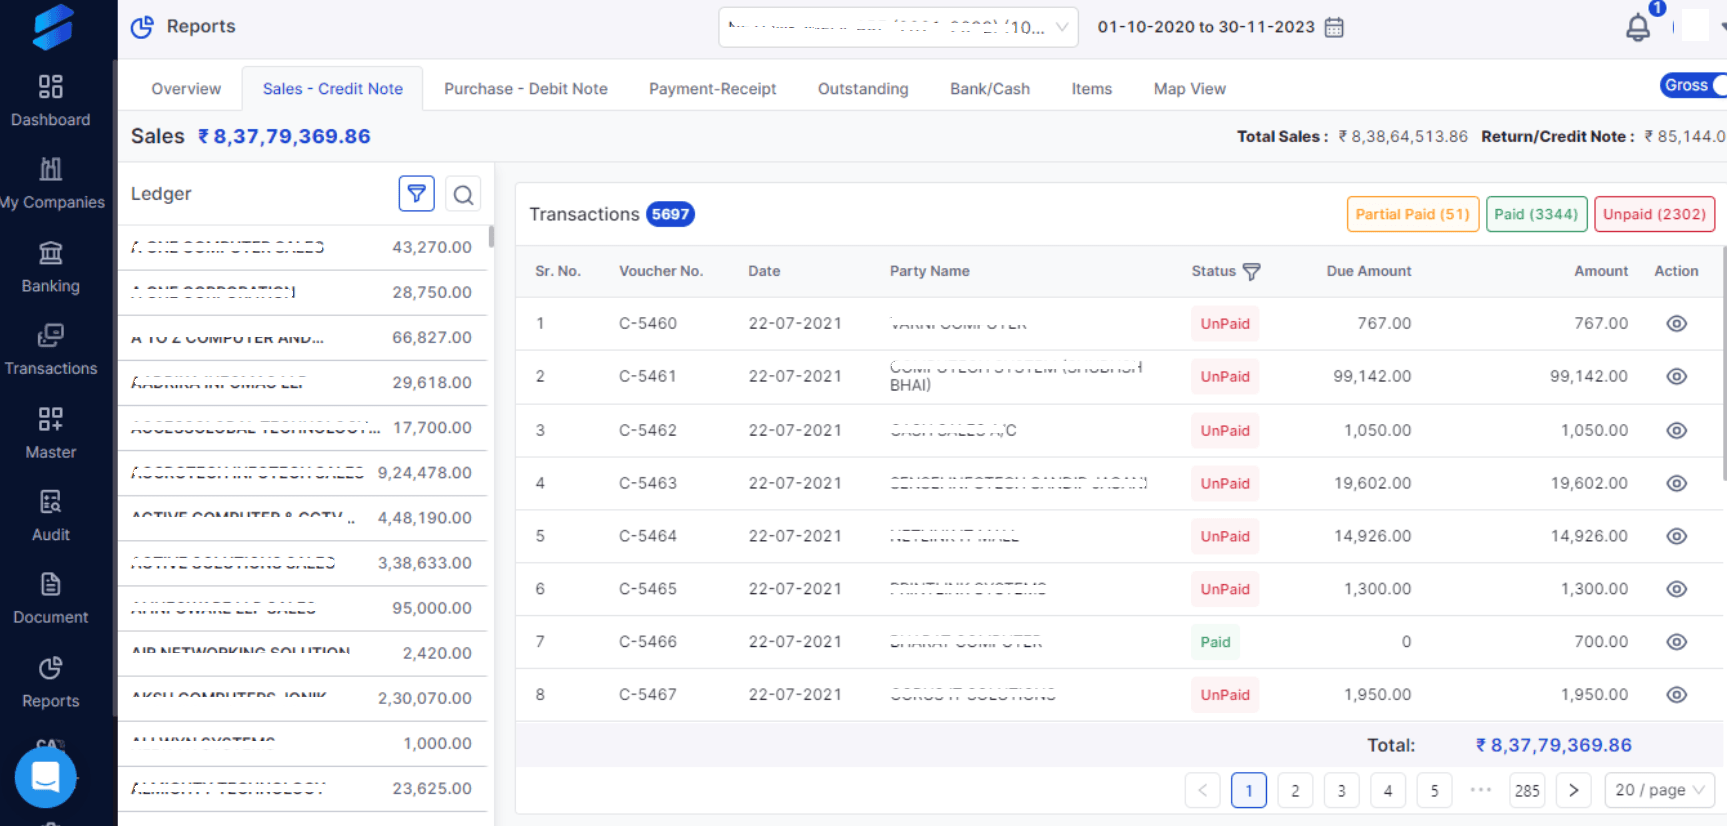
Step 2: Suppose you want to see sales-credit note, then the screen will look something like this:
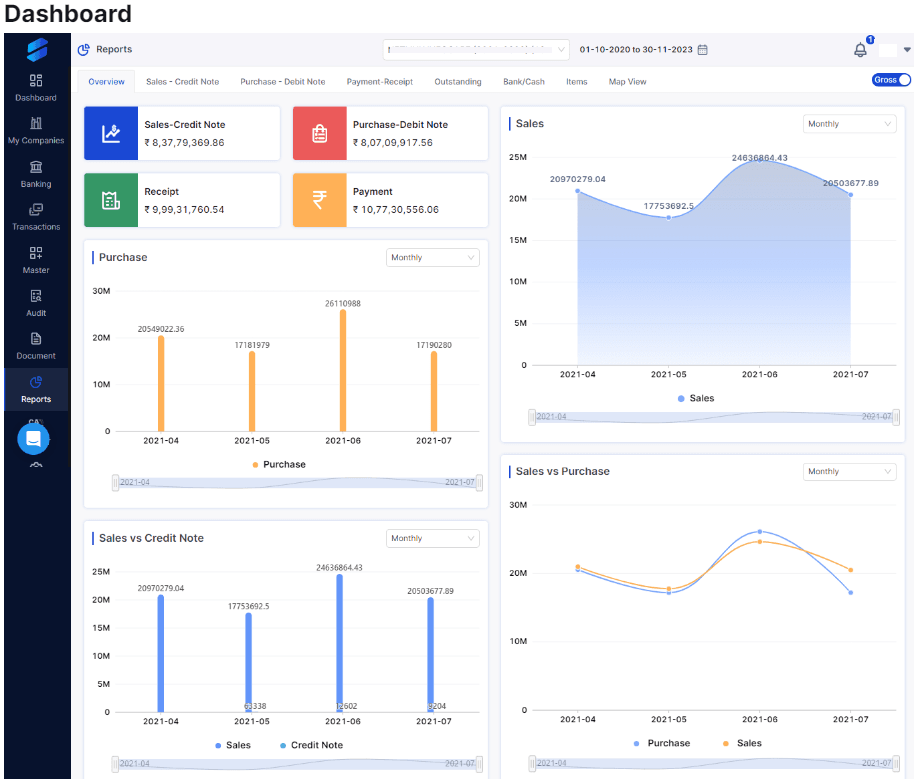
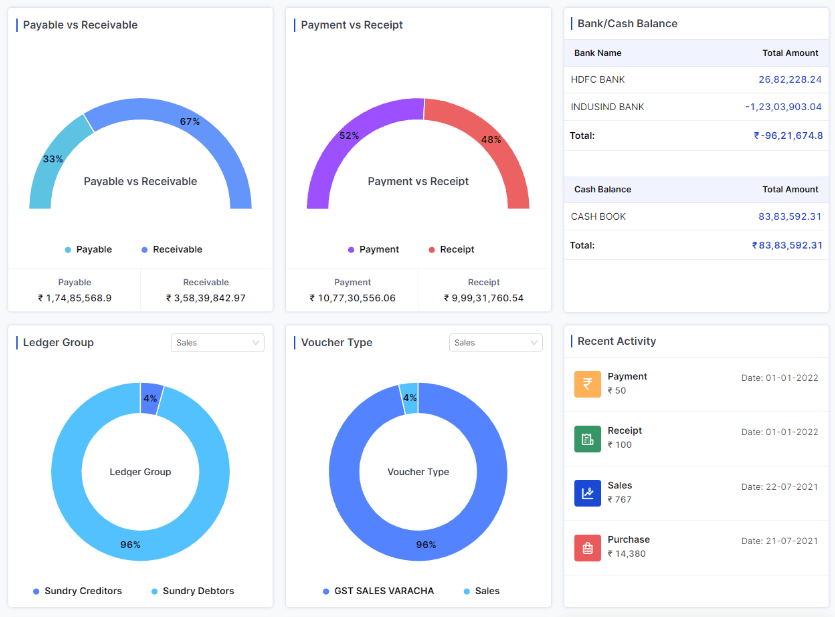
Step 3: The application will show you a dashboard with graphs of different data types, such as sales, purchases, payments, receipts, payables, receivables, and more, after you choose the company and date.
Benefits of Using Vyapar TaxOne to Manage Sales and Sales Return
Using Vyapar TaxOne to manage your sales and sales return transactions can have many benefits for your business, such as:
- Save time and effort by avoiding manual data entry and errors.
- Create invoices for sales and sales return with ease and efficiency.
- Sync your data with Tally in real time and avoid any discrepancies.
- Have track of your data with reports & analytics.
- Make clever financial decisions based on trends and analysis.
Still thinking about it? That’s okay, we’ve got you covered. Enjoy a 7-day trial period and make up your mind.


